
back to share a quick and easy home project. (and don't fret. a few outfit photos will be posted next!)
i admit, i am a "form over function" person, but that gets tough when i actually need function in my life. take these vintage drawers:
.jpg)
i have three of them that i use to store DVDs. to find a movie, however, i have to unstack them (they're heavy), or slide them around. and they don't slide on the floor either. they scrunch up the rug, it is a disaster.
after spending some time on pinterest, i realized i could just add wheels. super easy - but sounds intimidating. hopefully this will inspire you to check off some easy projects that add a little more function in your life :)
disclaimer: i am not responsible for any injury or ill-outcome with this project. good luck!
time: took about 10 minutes per drawer, so 30 minutes total.
supplies: casters (wheels) 4x per drawer, screws, drill, screwdriver and of course, a drawer or box.
here's exactly what i used:
.jpg)
.jpg)
.jpg)
.jpg)
casters came in bags of 2 each, so 6 bags or 12 casters/wheels.
each caster had 4 holes for the screws. with 4 wheels per box, i needed 16 screws per drawer.
3x16 = 48 screws, so the box of 50 worked great.
** tip - make sure the body of the screw can fit into the hole, but the head is big enough to stick out. i took photos of the ones i used because they met that criteria.
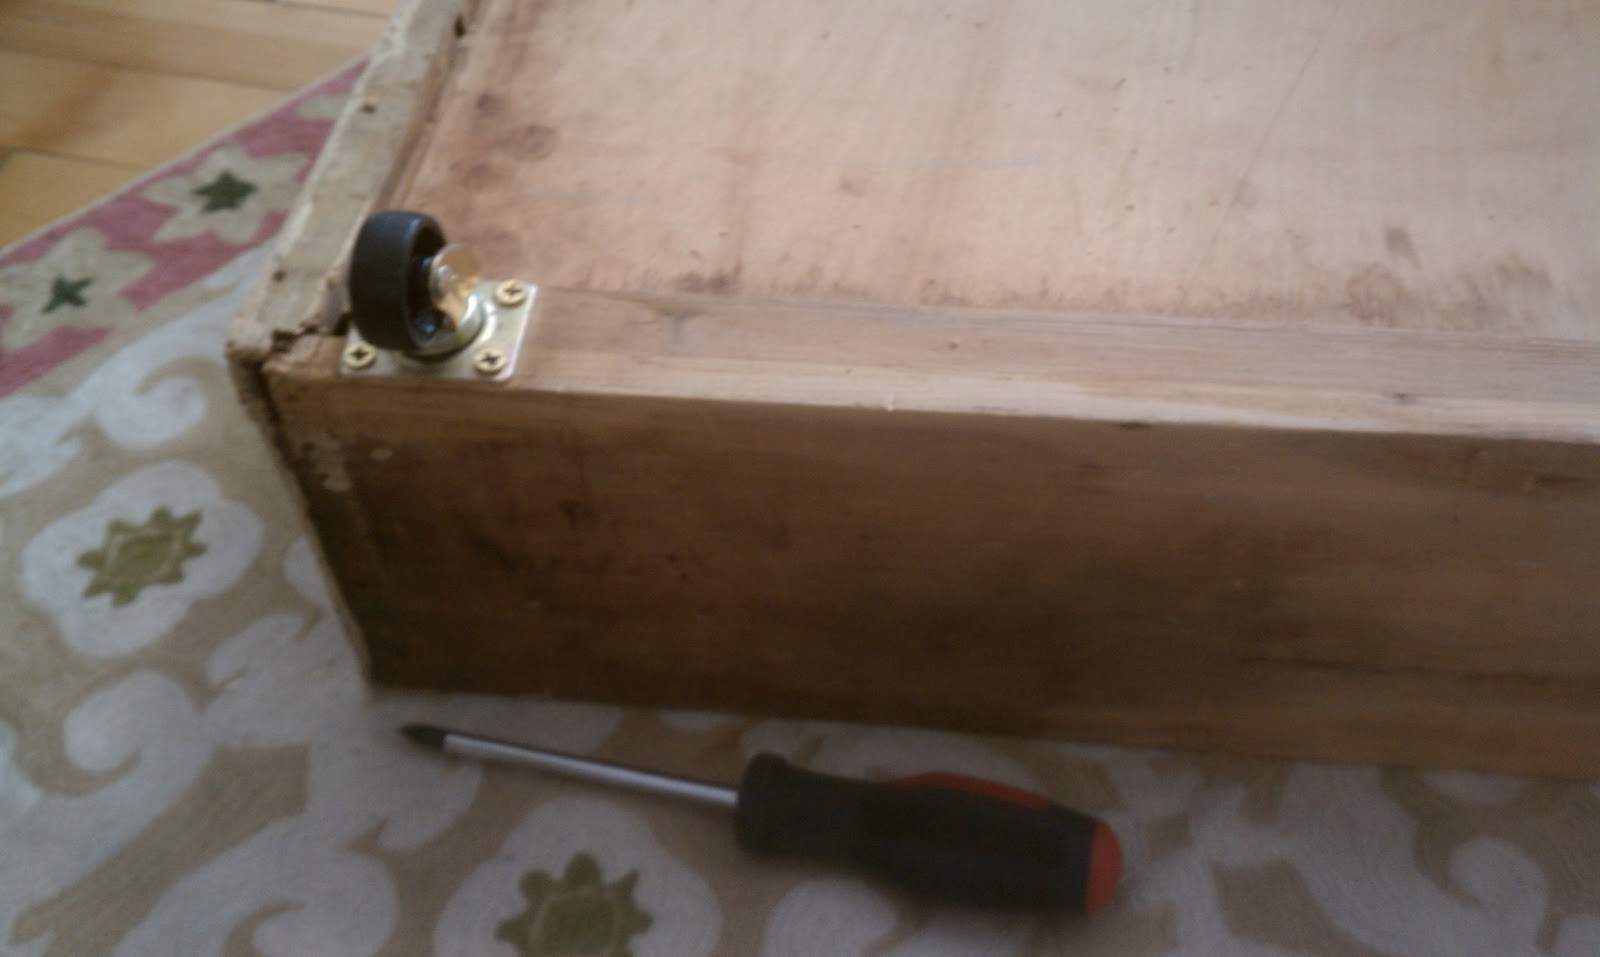
so now for the fun. i pre-drilled holes before i actually screwed into the wood. this step makes the actual screwdriving much easier. before starting, i turned the drawers over and decided where to place the wheels.
.jpg)
the drawers had additional wood on the bottom that were used to slide in and out of wherever they were originally. because it was raised, it made the perfect spot to place the wheel.
.jpg)
at first i put it right up to the edge, but then the wheel hung over the drawer. this means it would stick out when in place. also, the wood on the edge was worn and not the best for screwing into.
.jpg)
i moved the wheel in a bit to allow the wheel room and get to better wood. time to get drilling!
.jpg)
you could mark with a pencil first, but i just kept the caster on the drawer to be speedy. probably less chance of hitting the drill bit with the metal caster :)
.jpg)
here is what it looks like if you moved the caster:
.jpg)
i drilled all four holes first, then used my screwdriver to put the screws in place.
.jpg)

and then just do that 3 more times! it doesn't matter if you would rather drill all the holes first, then screw or do one wheel at a time. i prefered to break it up so my hand didn't get tired :)
and then... voila! a drawer that wheels around.
.jpg)
.jpg)
.jpg)
i loaded them back up with the DVDs and rolled them under my daybed in the living room. perfection. now form is also functional.

until next time,
S
No comments:
Post a Comment